Thursday, October 28, 2010

Cute Hair for Halloween

Hello All! And Happy Almost Halloween!

So my 4 year old has decided to be a bumble bee for halloween (which is fine by me bc that's a costume I already have!) and I've been thinking of things to do with her hair and makeup that would be fun and age appropriate.

I played around and came u with this. Hopefully ya'll like it :) So here's a tutorial on the hair and I'll do one on the makeup in a while.

Nothing elaborate, but everything fun :)
_______________________________________
YOU WILL NEED: spray bottle (water), comb/pick, and some yellow/black hair elastics (some big and some small)
part the hair down the middle in a strait line.
make sure its nice and wet, evenly on both sides. it stays in place longer that way.
make 2 little piggy tails right in front. I'm using yellow hair ties bc she's a bumblebee, but this is a fun hair do for any other costume as well.
make another piggy tail behind one side and pull the opposite piggy tail from the front into the tie.
and do the same on the other side so they cross.
repeat the process one more time and do the same criss cross so you have a total of 2 "x"'s on top.
french braid down about 3/4 of the way then pull up the rest into a piggy tail.
twist the piggy tail bc you're going to make a sort of bun. leave about 2-3 inches of hair untwisted and out of the bun.
(she has really fine hair and a real bun won't stay) It should look something like this so far.
now fan out the part that you didn't twist around the whole bun so it looks kind of fun and crazy
repeat those same steps on the other side and it should look kind of like this when you're done....
and here's what it looks like from the top.

like I said, not super fancy, but fun for sure!

I don't have the supplies yet (which is why there are no pictures), but I'm making a trip to the dollar store tomorrow to buy fuzz balls and pipe cleaners and i'm going to clip little antennas to her head on top.

Sunday, October 17, 2010

Zumba shirt "How To" Part2: The halter

After you have completed the weave section of the shirt you can move on to the rest of it :)

First lay the shirt out flat on your work surface. I just used my kitchen table.
First step, cut off the sleeve seams. Don't cut too far in, just right by the seam.
Cutting out the sleeve seams makes it easier to cut from on arm hole to the other bc you don't have to cut through the seams. So as you've already guessed this step is cutting a strait line from the bottom of one arm hole to the bottom of the other. If you need help doing this you can use fabric chalk and a ruler to draw the line.
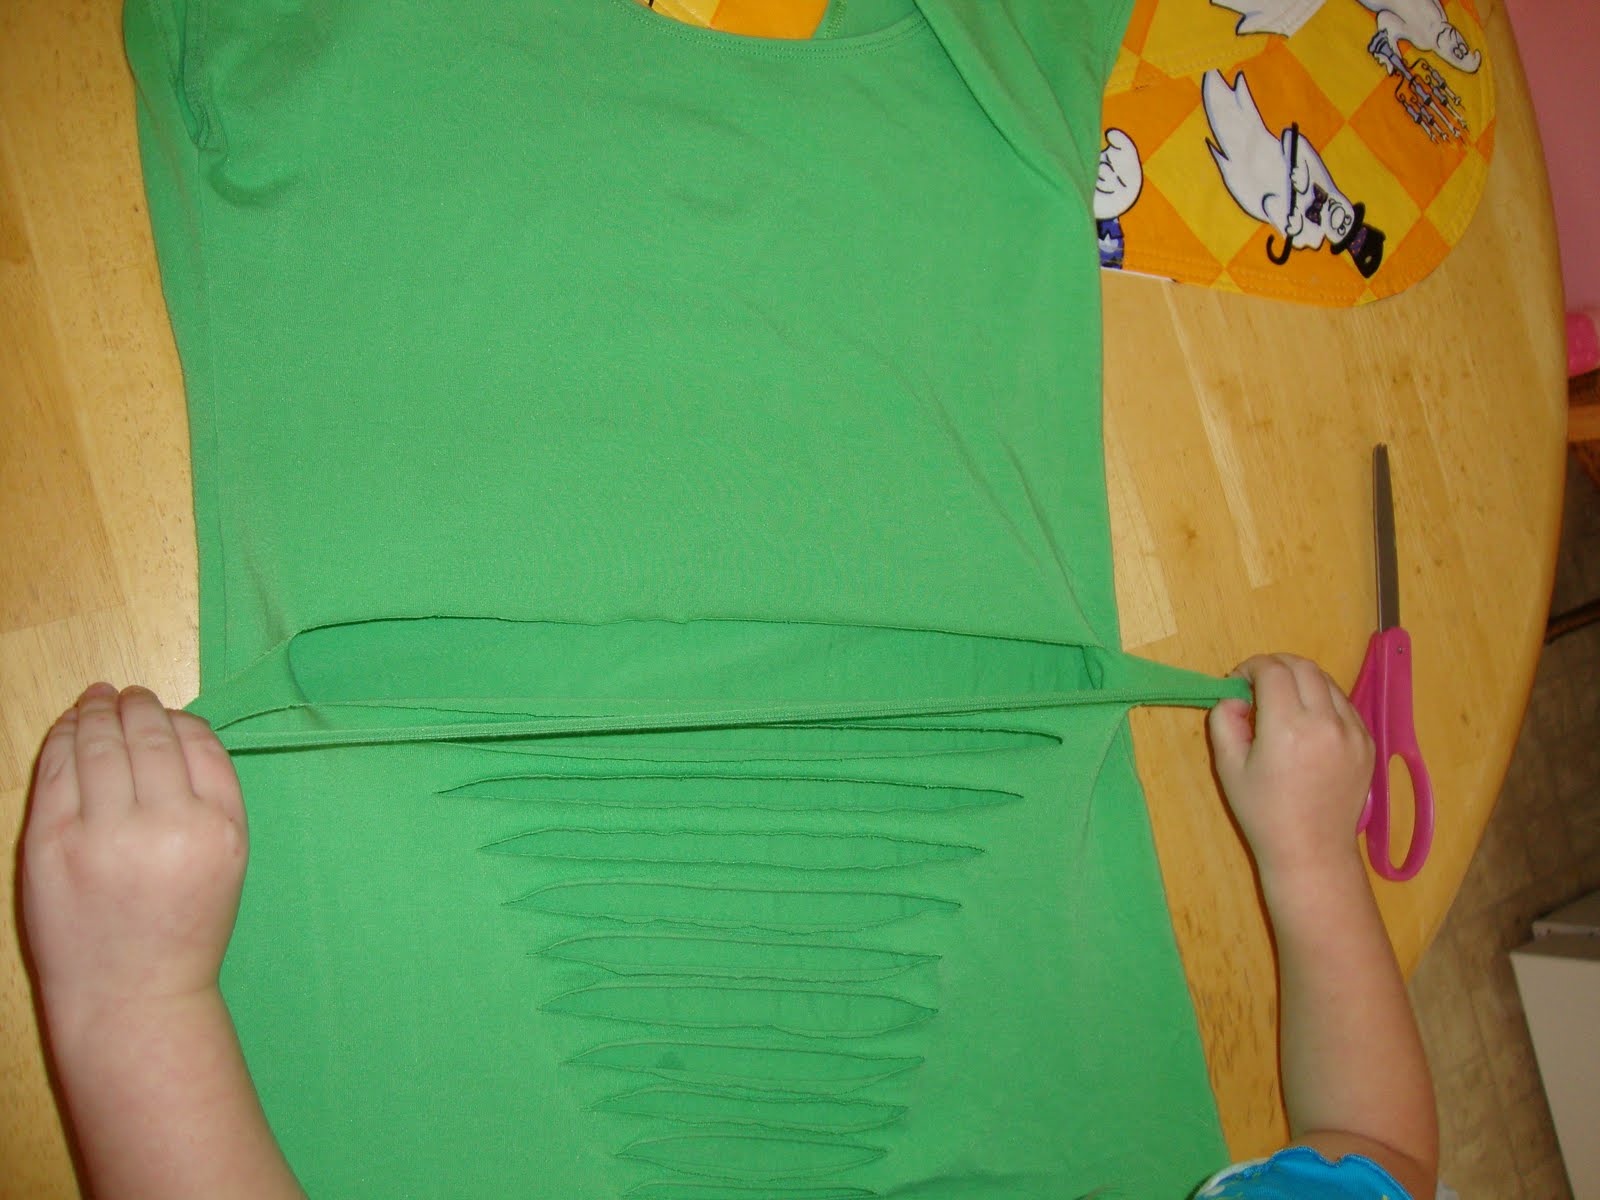
Lay the flap you've created out and....
....make a clean snip right through the middle of the top portion.
Cut out the neck seam. You can do this before, like while you're cutting the sleeve seams off, but of course while I was taking picture I didn't think about that haha but either way it needs to come off.
Place your stencil in the middle of the top back portion of the shirt. Very carefully bc tshirt fabric like sot move on you and is very slightly elastic :/ run your marker around the outside lines of your logo stencil. Remember that you're going to be coloring it in so what it looks like inside doesn't matter. It's the outside lines that count! You could also use fabric paint and sponge it on over the stencil which would probably look pretty awesome.
Now that you've got your outline you can color it how ever you'd like. You could even get wild and use another color marker, whatever you do make sure its permanent!
If you decided to partial color like I did it should look something like this. If not it should look similar to whatever the logo (on paper) was before you made it into a stencil. You're getting close!!!!
Now its time to break out your sewing kit!!!
Before you begin sewing you are going to need to cut the top part of the shirt off with just enough material left on top to fold over. Do not throw the excess away yet!
Find a similar color thread and using the picture below as a guideline sew little stitches through the bottom of your folded over material. This is going to help hold your strap on. make sure you leave enough space to pull some ribbon or material through there! You're going to do this on both sides.
Here is the finished sewing on one side. Now, if you have a sewing machine feel free to break it out and just sew a line right across there. It'd be a ton easier, but I don't have one so this is how I did it.
Now remember I told you not to throw the left over material away yet? This is why! The bottom of your left over scraps is the same length as the top of the shirt you just sewed on so cut about a half inch to an inch of material off the bottom of your scrap.
Stretch it just like you did with the weave strands until it curls.
Pin a safety pin to one end. (this just makes it easier to pull through) Pull it all the way through the space you left and remove the safety pin. Once your safety pin is out tie the ends of the strand together in a knot and pull tight! then circle the loop you just made through until you can't see the knot anymore.
Once you have both sides done it should look like the above photo. This was before i turned it to hide the knots...
Find two ribbons or whatever you want the rest of your straps to be made of (a string of beads would probably be really cute, but not for a shirt you're going to do zumba in, i cant imagine that would be too comfortable) and a needle and matching color thread.
(again before i turned the knot) Put the ribbon through the loop, only about an inch on the "in"side.
fold it over so you can sew it together. just a few stitches side to side one direction and then back the other direction to ensure its going to stay Then knot it and cut off the excess thread.
It should look similar to this when you're done sewing it.
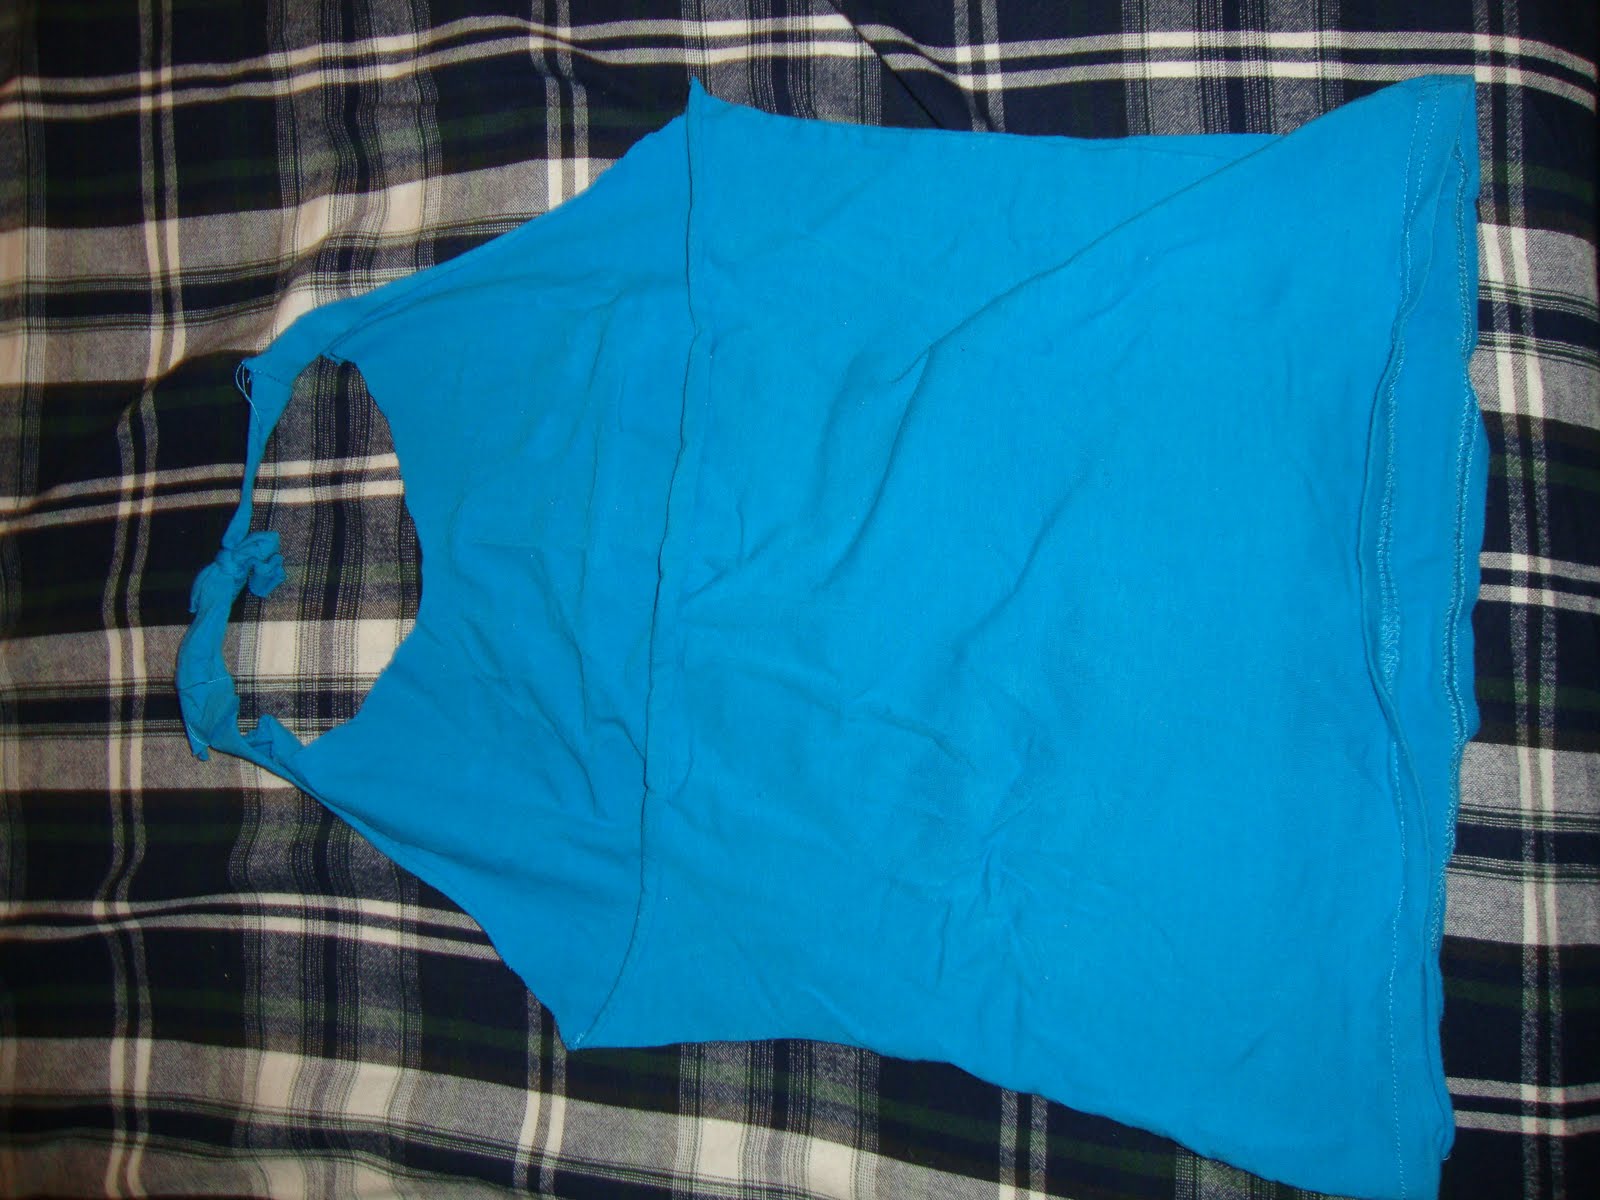
and here's the back when its completed
And I know you don't want to see a picture of my boobs, but once again make sure you try it on to see that it looks right. It should look something like this in the front when you're done.

Hopefully you understood that pretty well!!! I hope you enjoyed this Zumba shirt tutorial, there will be more to come soon hopefully. I will continue to post updates on my faebook and I'm actually currently working on a video on "the weave" that will be much easier to follow, so look for that too. Thanks so much for reading!!!

Friday, October 15, 2010

Zumba Shirt "How To" Part1: The Weave

First find a Zumba logo you like and print it out on a sheet of card stock. Then using an exact-o knife (or a pair of scissors which you have to be very careful with so you don't cut too much) cut out the logo so you're lift with a stencil of the logo you printed out. You don't have to use this particular one, it will work the same way with all of them :)
Then, of course, lay out the shirt you want to use. I used a regular fitted tee. (one of the suzy q ones from walmart that i purchased a few months ago, size medium) You want something that's not too loose and has a little bit of elasticity.
Next align the side seams all the way up so the fold in the shirt is front to back, not side to side. With this new fold lay the shirt flat on your work surface and smooth out any wrinkles.
Using a sharp pair of scissors start with a small snip (about a 1/2-3/4 inch) just above the bottom seam of the shirt and about every half inch (traveling upward) cut another line that is progressively longer than the one below it. Do this till about half way between the bottom of the shirt and the bottom of the sleeves.
Turn the shirt back to a normal fold and begin pulling at the side of each strand (make sure to do them individually) until they fold in. Cutting complete for this portion!
Now you need some where to put the shirt so you can weave it. I used the back of one of my kitchen chairs. You can use a willing person or a manikin if one is available. It should look something like the picture above. Don't fret if your lines are a little uneven. After you weave it you'll barely be able to tell :)
OK so this is going to be hard to explain, hopefully i'll be able to do it well enough so you'll understand. This is where the video would come in handy :/ lol. starting at the top, pull out the first two strands. Pull the bottom one over and under the top one let go of the top so you are only holding on to the second strand. It should look like the above picture. I hope that makes sense!!! Continue this motion all the way down the shirt. Pull out the next strand and pull it over and pull it down around the second strand and then let go of the second strand.... are you getting this? If you have any questions feel free to leave me any number of comments.
See what I mean? You can see the weave coming through after the first couple strand pulls.
When you get to the bottom (the very last strand) using a ribbon or a pulled material scrap tie the last strand to the very bottom of the shirt. I used a regular black cut of ribbon bc I'm making my logo black.
It should look like this when you're done.
And it should look something like this on when you're done. The weave is very easily adjusted with your fingers so make sure you do try it on to make sure it looks the way you want it to.

I hope you understood and enjoyed weaving your shirt. And if you're only reading it now good luck!! Read my next blog entry for the next part of how to make this Zumba shirt :)

Reconstruction Project number 2

Second attempt!

another super easy one that involves a tiny bit of sewing, but also that anyone can accomplish in under a half hour. Of course I took one of my husband's old t-shirts that he doesn't wear anymore and snipped and sewed to make this. I wear it to the gym :)

Here's a shot of the front:
and here's a shot of the back:
*all you have to do to any of these images to enlarge them is simply click on the one you want to see a bigger pic of :)


My very first reconstruction

So this was my first attempt at t-shirt reconstruction and it turned out pretty well i think, for my first time anyways! lol I turned a regular fitted tee (purchased a long time ago from rue 21 on sale for cheap) into a halter.

Super easy! If you're looking for a first project this would be it!!!

All you do is cut off the sleeves along the inside of where they connect to the rest of the shirt, then cut a strait line from the bottom of one sleeve hole to the bottom of the other. Flip the top section of the shirt up and snip strait down the middle to make straps. (shape those as you'd like, just don't go any thinner than one inch) Cut the neck line seam out and tie the straps! It's as simple as that! I'll do another one down the road sometime so that I can take step by step pictures, but really anyone can do this. All you need is scissors and the shirt :)

So here's a picture of the front:
and here's one of the back: