Thursday, November 17, 2011

I LOVE Fall colors!

I made this hair clip yesterday and I was so excited to be wearing brown today so I could try it out. It's 3 flowers on one clip and I just love the light brown and orange. Sorry about my hair, I had all of a single minute to throw it up this morning. Anyway, I just wanted to share because I love the clip and especially the colors.


I may not get a chance to post again before Thanksgiving because my baby is sick, so just in case, Happy Thanksgiving to all my readers! I hope you all have an amazing and delicious day!

Sunday, November 13, 2011

Pomander Tutorial

While I was surfing google and crafting blogs this morning (like any other Sunday afternoon) I found this. How cute are these? I just love them! I can't wait to make a couple and hang them up in my daughter's room. They will both just love them. And they're not hard to make either! I absolutely love finding tutorials for all the creative stuff people out there are designing. It's so much fun!


Credit goes to the writer of the Betz White Blog. Click here for the address and the tutorial and have fun crafting and creating!

Saturday, November 12, 2011

Fancy Lace Earring Holder

The original idea for this belongs to my bother-in-law, Jeremy, who made one of these for his wife out of a strip of material and a hanger to go in their closet. My mother-in-law then made a more durable version for my sister-in-law, after which Jeremy made three of the same for his wife. And then there's my version.


Pretty fancy huh?

Friday, November 4, 2011

Newest Hair Clips

Here are some of my latest Hair clips. I'm sharing a new idea next week for something really cute so stay tuned for those clips as well! Enjoy :)

Small and simple

Fall and glimmer

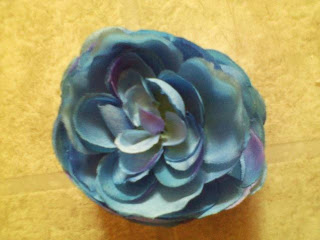
blue :)

new and shiny, but I like it

Rags to Riches, so to speak


Want to add a little "somethin somethin" to an old pair of jeans? So did I. So I did. Using the glue and jewels pictured above, (both purchased at Michael's Arts and Crafts Store, not expensive.) I added jewel accents to an old pair of jeans I had.

What do ya'll think? It was really easy, just follow the pictures. Using small dots of glue where you want to place the jewels (I chose along the decorative seam, you can choose where ever you want) and immediately after laying a small row of dots, place the jewels on top. Let it dry for a whole day before you wear them and wait a week to wash them. I've already washed mine and the jewels are all still there.

Adding Cuteness to Plain Ballet Flats

So I've had these plain black ballet flats for over a year now and I should have done this a LONG time ago, but I just never got around to it till last week. I decided that they were boring so they needed a little something extra. Here's what I did :)

*Pardon the dirty soles...
With just a little black ribbon and a few self stick rhinestones I added quite a bit to these used-to-be-boring shoes.

Happy Friday!

Wednesday, September 21, 2011

Cute, Easy Craft: Pet Rock

My daughter and I went up to Timpanogos Lodge for her second field trip yesterday. It was a BEAUTIFUL day up the canyon. It was time to go by the time our group got to the "Pet Rock" making station, so I told her to grab a couple arms and some eyes so we would make one at home. I'm really glad we did because it turned out WAY cuter than the ones that they were doing. We had something special: PAINT and BEADS. Imagine that. haha

Anywho, I'll probably end up running to the Dollar Tree later today to buy a package of eyes and a package of pip cleaners so my youngest can make a Pet Rock, too. This is fun and EASY craft to do with your kids on the weekend or something or with those restless kindergarteners who you can't seem to entertain without the TV until it's time to go pick up your older kids. (Or till it's time to make dinner when Daddy gets home because you have no older kids yet)


All you need for this craft is:
-1 rock, any shape/size
-2 pipe cleaners, any color
-2 eyes, big or small
-Some acrylic craft paint and a sponge or brush to paint with
-Hot glue gun and hot glue
-Hair dryer on low heat and low power
-a toothpick (optional)
-a single bead, any color/shape (optional)
*Dollar Tree and Family Dollar sell packs of multi-size eyes and multi-color pipe cleaners for a buck each! Can't get any better than that!


-First, you paint your rock. Let your kiddos get creative. My daughter's rock is pretty plain, but she insisted on only having purple and no other colors. After they are all painted you can use the blow dryer to speed up the drying process.
-Once you can touch all sides of the rock with dry fingers and get no paint on your fingers, you're ready to move on. So go ahead and use your hot glue gun to glue the eyes on whatever rock face you want.
-Next come the arms. To make the swirls like in the picture you just hold the pip cleaner in between 2 fingers and wrap the remaining part around on of your fingers. Then slowly pull it off and VwaLa! Curly arms. Or you can do straight arms, or zig zags or whatever. Then just straighten part of one end out and glue it towards the back of the bottom. Do the same to the other and glue it towards the front of the bottom. This will help the rock from teetering and being unsteady when still on a hard surface.
-Next, if you wish, take the bead and glue it in between the eyes on the bottom side of the eyes. Then finish it off by using your tooth pick to paint your child's name/initial(s) on the back side of the rock.


Aren't they cute? It's pretty self-explanitory, I probably didn't even need to include instructions, but I needed the typing practice. haha Enjoy :)